
Finding the right make-up artist to trust with your make-up on your wedding day, especially at a special destination, can be a difficult task.
A budget friendly solution is to do you own make-up, after all you’re probably already fairly aware of what suits your skin type and style. Below are my top tips on how to do your own make-up for a destination wedding…
Step 1: It all starts with your skin!
To apply make-up that looks natural and fresh for your big day, ensure you give your skin some TLC, after all your skin is the base of your make-up so it’s a super important step.
Depending on your skin type I recommend having monthly facials 6-12 months prior to your wedding to get your skin completely flawless and in the very best condition it can be. If you have problematic skin you may lack confidence wearing make-up, so having monthly facials to help improve your skin tone will not only help boost your confidence on the day, but also ensure you are happier with your overall appearance of your make-up and photographs.
 A wedding skin care specialist I would recommend if you’re in the North West is Jessica Attwood she specialises in Chemical Peels, micro-needling, dermaplaning and glow facials. Jessica will take you through a full skin analysis to determine what would best suit your skin type and requirements.
At Home Skincare:
A good at home skincare routine is essential to continue the work that your regular facials are having, and also are ideal for those who aren’t able to have monthly or regular facials.
Creating a consistent and effective routine can give you amazing results, so is well worth it for that wedding glow. I recommend using natural skincare that is completely free from nasty ingredients for healthy skin. Your local Boots have specialist skin therapists who can help guide you on what products are best suitable for your skin type and will help you build an effective routine, so it’s best to take advice from experts before purchasing.
Brows are the real deal:
Brows are often the first part of your face (apart from your beaming smile) that guests will notice when you’re walking down the aisle. So, make sure you have them perfectly groomed and shaped! One of my favourite brow kits are from Anastasia Beverly Hills. Their pomades and powders are ideal for setting and shaping your brows, whilst ensuring they are waterproof for all day staying power! Alternatively, if you’d rather not apply your own brows, I’d recommend one of the following treatments…
HD Brows:
HD Brows (High Definition brows) involves signature waxing, threading, tinting and make-up application for picture perfect brows. This is an ideal low cost treatment to have prior to your wedding as HD brows last 6 weeks+.
 SPMU:
SPMU:
If you have a more to spend, I would suggest semi-permanent brows especially for those who have little to no brow hair, or your lacking shape and definition. Semi-permanent brows give you a long term result and there are various methods you can look into such as;
Microblading: Soft Hyperrealism strokes that mimic your real hair, gently placed to create a natural brow. This style isn’t recommended for oily/combination skin types as it won’t last as long term and more frequent top ups are required. Lasts 12 months +
Combination powder brows: This is a machine method which gives the appearance of tinted brows, but with strokes to create a natural but filled in brow. Recommended for all skin types. Lasts 18 months+
Ombre powder brows: Another machine method that is ideal for a softer gradual fade which starts from the bulb of the brow to the tails. This style can be as soft or as bold as you prefer. Lasts 18 months+
I recommend having any semi-permanent treatments done prior to your wedding to allow for your initial treatment to heal and your top up session to heal price range for this starts between £200-£300
Another semi-permanent treatment you might want to consider for a completely low maintenance day is lip blush. Performed with the machine method to create lovely shape, definition and colour to your lips, this treatment will also speed up your time getting ready without risk of transferring or fading. Fuss free brows and lips!
How to do your make-up on the day:
Start the day with your skin prep for a long lasting base before you apply any make-up.
Apply your routine: Cleanse, exfoliate, serum, eye cream and moisturise. Avoid oil based products as this will give you a sticky base and can causing patchiness during the day.
Secondly, once you’ve completed your skin prep it’s time for the base. Apply your foundation using your favourite blending brushes or sponge. I prefer to use a beauty blender. Gently apply two pumps of foundation or tinted moisturiser depending on the type of base your prefer. I love the SmashBox cosmetics foundation as there’s no “white” flash back on photographs and provides full coverage.
To create a subtle contour and blush, Doll beauty have a fabulous range of blushes and bronzers for the perfect photo finish.
Setting powder:
This is essential if you want your make-up to stand the test of time. My favourite powder is the Becca cosmetics Hydra mist setting powder. This locks in your foundation, and feels hydrating without being cakey for a flawless finish.
 Eye makeup:
When deciding what eye-shadow choice to use, it’s best to look at your eye colour to determine what will suit you best.
Blue eyes: Browns and oranges for blue eyes
Brown eyes: Copper, bronzes and rose golds for brown eyes
Green/Hazel eyes: Taupe, browns or for green/hazel eyes.
The most common eye make-up style to perform is a graduation of colour from light to dark (light from the beginning of the eye will open the eyes and blending in a darker brown or copper colour in the crease)
Lashes:
Applying lashes can be stressful on the morning of your wedding as they can be tricky to apply correctly. I recommend having classic individual lashes before you go on your dream wedding to save time and for the very best natural look.
Lips:
Depending on the style of your wedding either a classic red lip or nude will go perfectly. Ensure you apply a lip liner for shape and definition that goes over your lips for additional staying power, as well as a good lip conditioner beforehand to avoid chapping.
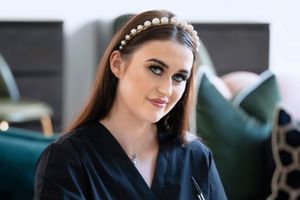
by Tori Rosero, Make-Up Artist & Founder of Glowblade Academy
Finding the right make-up artist to trust with your make-up on your wedding day, especially at a special destination, can be a difficult task.
A budget friendly solution is to do you own make-up, after all you’re probably already fairly aware of what suits your skin type and style. Below are my top tips on how to do your own make-up for a destination wedding…
Step 1: It all starts with your skin!
To apply make-up that looks natural and fresh for your big day, ensure you give your skin some TLC, after all your skin is the base of your make-up so it’s a super important step.
Depending on your skin type I recommend having monthly facials 6-12 months prior to your wedding to get your skin completely flawless and in the very best condition it can be. If you have problematic skin you may lack confidence wearing make-up, so having monthly facials to help improve your skin tone will not only help boost your confidence on the day, but also ensure you are happier with your overall appearance of your make-up and photographs.
A wedding skin care specialist I would recommend if you’re in the North West is Jessica Attwood she specialises in Chemical Peels, micro-needling, dermaplaning and glow facials. Jessica will take you through a full skin analysis to determine what would best suit your skin type and requirements.
At Home Skincare:
A good at home skincare routine is essential to continue the work that your regular facials are having, and also are ideal for those who aren’t able to have monthly or regular facials.
Creating a consistent and effective routine can give you amazing results, so is well worth it for that wedding glow. I recommend using natural skincare that is completely free from nasty ingredients for healthy skin. Your local Boots have specialist skin therapists who can help guide you on what products are best suitable for your skin type and will help you build an effective routine, so it’s best to take advice from experts before purchasing.
Brows are the real deal:
Brows are often the first part of your face (apart from your beaming smile) that guests will notice when you’re walking down the aisle. So, make sure you have them perfectly groomed and shaped! One of my favourite brow kits are from Anastasia Beverly Hills. Their pomades and powders are ideal for setting and shaping your brows, whilst ensuring they are waterproof for all day staying power! Alternatively, if you’d rather not apply your own brows, I’d recommend one of the following treatments…
HD Brows:
HD Brows (High Definition brows) involves signature waxing, threading, tinting and make-up application for picture perfect brows. This is an ideal low cost treatment to have prior to your wedding as HD brows last 6 weeks+.
SPMU:
If you have a more to spend, I would suggest semi-permanent brows especially for those who have little to no brow hair, or your lacking shape and definition. Semi-permanent brows give you a long term result and there are various methods you can look into such as;
Microblading: Soft Hyperrealism strokes that mimic your real hair, gently placed to create a natural brow. This style isn’t recommended for oily/combination skin types as it won’t last as long term and more frequent top ups are required. Lasts 12 months +
Combination powder brows: This is a machine method which gives the appearance of tinted brows, but with strokes to create a natural but filled in brow. Recommended for all skin types. Lasts 18 months+
Ombre powder brows: Another machine method that is ideal for a softer gradual fade which starts from the bulb of the brow to the tails. This style can be as soft or as bold as you prefer. Lasts 18 months+
I recommend having any semi-permanent treatments done prior to your wedding to allow for your initial treatment to heal and your top up session to heal price range for this starts between £200-£300
Another semi-permanent treatment you might want to consider for a completely low maintenance day is lip blush. Performed with the machine method to create lovely shape, definition and colour to your lips, this treatment will also speed up your time getting ready without risk of transferring or fading. Fuss free brows and lips!
How to do your make-up on the day:
Start the day with your skin prep for a long lasting base before you apply any make-up.
Apply your routine: Cleanse, exfoliate, serum, eye cream and moisturise. Avoid oil based products as this will give you a sticky base and can causing patchiness during the day.
Secondly, once you’ve completed your skin prep it’s time for the base. Apply your foundation using your favourite blending brushes or sponge. I prefer to use a beauty blender. Gently apply two pumps of foundation or tinted moisturiser depending on the type of base your prefer. I love the SmashBox cosmetics foundation as there’s no “white” flash back on photographs and provides full coverage.
To create a subtle contour and blush, Doll beauty have a fabulous range of blushes and bronzers for the perfect photo finish.
Setting powder:
This is essential if you want your make-up to stand the test of time. My favourite powder is the Becca cosmetics Hydra mist setting powder. This locks in your foundation, and feels hydrating without being cakey for a flawless finish.
Eye makeup:
When deciding what eye-shadow choice to use, it’s best to look at your eye colour to determine what will suit you best.
Blue eyes: Browns and oranges for blue eyes
Brown eyes: Copper, bronzes and rose golds for brown eyes
Green/Hazel eyes: Taupe, browns or for green/hazel eyes.
The most common eye make-up style to perform is a graduation of colour from light to dark (light from the beginning of the eye will open the eyes and blending in a darker brown or copper colour in the crease)
Lashes:
Applying lashes can be stressful on the morning of your wedding as they can be tricky to apply correctly. I recommend having classic individual lashes before you go on your dream wedding to save time and for the very best natural look.
Lips:
Depending on the style of your wedding either a classic red lip or nude will go perfectly. Ensure you apply a lip liner for shape and definition that goes over your lips for additional staying power, as well as a good lip conditioner beforehand to avoid chapping.
by Tori Rosero, Make-Up Artist & Founder of Glowblade Academy
Add new comment